
Digital Desk Stats 1.0.0.0 Manual
Hello! Thank you for using Digital Desk Stats (DDS). This program tracks your stats whether it’s reference, circ, or whatever you need to track. Hopefully this little program will save you some time in your day to day operations.
Installation
- Download the installer program and run it. Everything should run automatically. Don’t worry, it’s not malware – if you get a “Windows protected your PC” screen, click “more info” and then “Run anyway.”
- Currently, it only runs on Windows. Apple support is on the ToDo list!
- Accept the license agreement and click “Install.” The program installs:
- Digital Desk Stats - this goes in your Programs folder (found in
C:\Users\yourusername\AppData\Local\Programs\DigitalDeskStats)
dds.ico and metropolis.ttf - this is the icon you click on to open the program and the font that the program uses.- A collection of icons and graphics for customizing your layout.
- A shortcut on your Desktop and your Start Menu.
First time opening
- You’ll be greeted by a popup saying that default settings have been initialized. This is the part where you’ll customize the program to your specific needs.
- The settings you edit will be written to a file called
config.json. In general, you shouldn't ever have to worry about this, but in case something goes wrong and you need to change it, it's in the folder you installed the program in.
- Navigate up to File → Options. This is where you’ll customize the program to your needs.
- In the General menu:
- Enter your library’s name in the Library name field.
- Add your library's logo in the Library logo field. Image must be in the .PNG file format.
- IMPORTANT: Choose the folder where you’ll save your stats in the Stat log directory field. This is where your stats will be written to in a .CSV file that can be opened in Excel.
- Click the checkbox next to “Network Directory” if you plan on using a shared network drive, sometimes called an
H: Drive. Do this if you have multiple computers that will be writing the same stats and sharing the same settings (for example, two computers at the reference desk). If you do this, make sure the folder is on a drive that all computers have read/write permissions for. Make sure to click Save after you pick the folder and click the Network Directory Box – this will make DDS “read” your settings into the program.
- If you will be using a network drive, pause here, go back to step 1 on each of the computers that will be sharing settings, get to this step, and repeat until all computers are pointing at the same network drive. Then, continue on.
- Set an optional password in the Admin password field. This will lock your options menu behind a password. If you forget it, you can find it in
config.json under “admin_password.”
Note that all these settings are optional. However, it is highly recommended that you pick a convenient location on your computer for the stats log location for easy retrieval.
- In the Statistics & Subcategories menu:
- At the top, you can add, remove, and rename desks. These are groups of statistics.
- In the left hand side (“Statistics”) box are your main statistics. There are a few in there by default, however, you can add, remove, or rename these in the corresponding fields.
- In the right hand side (“Subcategories”) box are the subcategories. These are specific to each statistic. You can have as many of these as you like, and it’s recommended these be tailored to each stat. Similar to the statistics, you can add, remove, and rename these as you wish.
- You can add an optional description to each statistic in the Stat description box. This will display when you hover over the statistic in the main interface.
- You can add an optional icon to each statistic in the Stat icon box. This will display next to the statistic in the main interface.
- There are some default ones included with the program, however, if you want to add your own, you can do so in the “icons” folder within the folder where the program is installed. It must be a a .PNG file and make sure that it looks good shrunken down.
A general recommendation is that left hand side statistics be “umbrellas” or categories, and right hand side be more specific instances as needed for tracking. For example:
- A “database” statistic may have the databases listed as subcategories.
- A “directional” statistic may have locations or general areas as subcategories.
- A “technology” statistic may have devices as subcategories, or whether it’s a patron device or library device.
These are entirely up to you. In general, “in-person,” “phone,” “email,” and “chat” make good subcategories if you can’t think of anything.
- In the Profiles menu:
- In the left hand side (“Profiles”) box are a list of users. Select one and sign in to modify or remove it.
- On the right-hand side are the parameters for editing or creating a new profile. Enter an email, display name, and password, and choose an optional profile icon. Click “Save profile” to save any changes made.
- Profile information can be found in
config.json under “profiles.” Passwords are encrypted – if a user forgets their password, it’s better to remove their profile in the file and have them create a new one in DDS.
- Profiles are optional. Statistics can still be recorded without signing in.
Click “Save” to save your settings and “Close” to close the menu. If you need to make changes to any of these, you can do so by selecting File → Options.
Using DDS
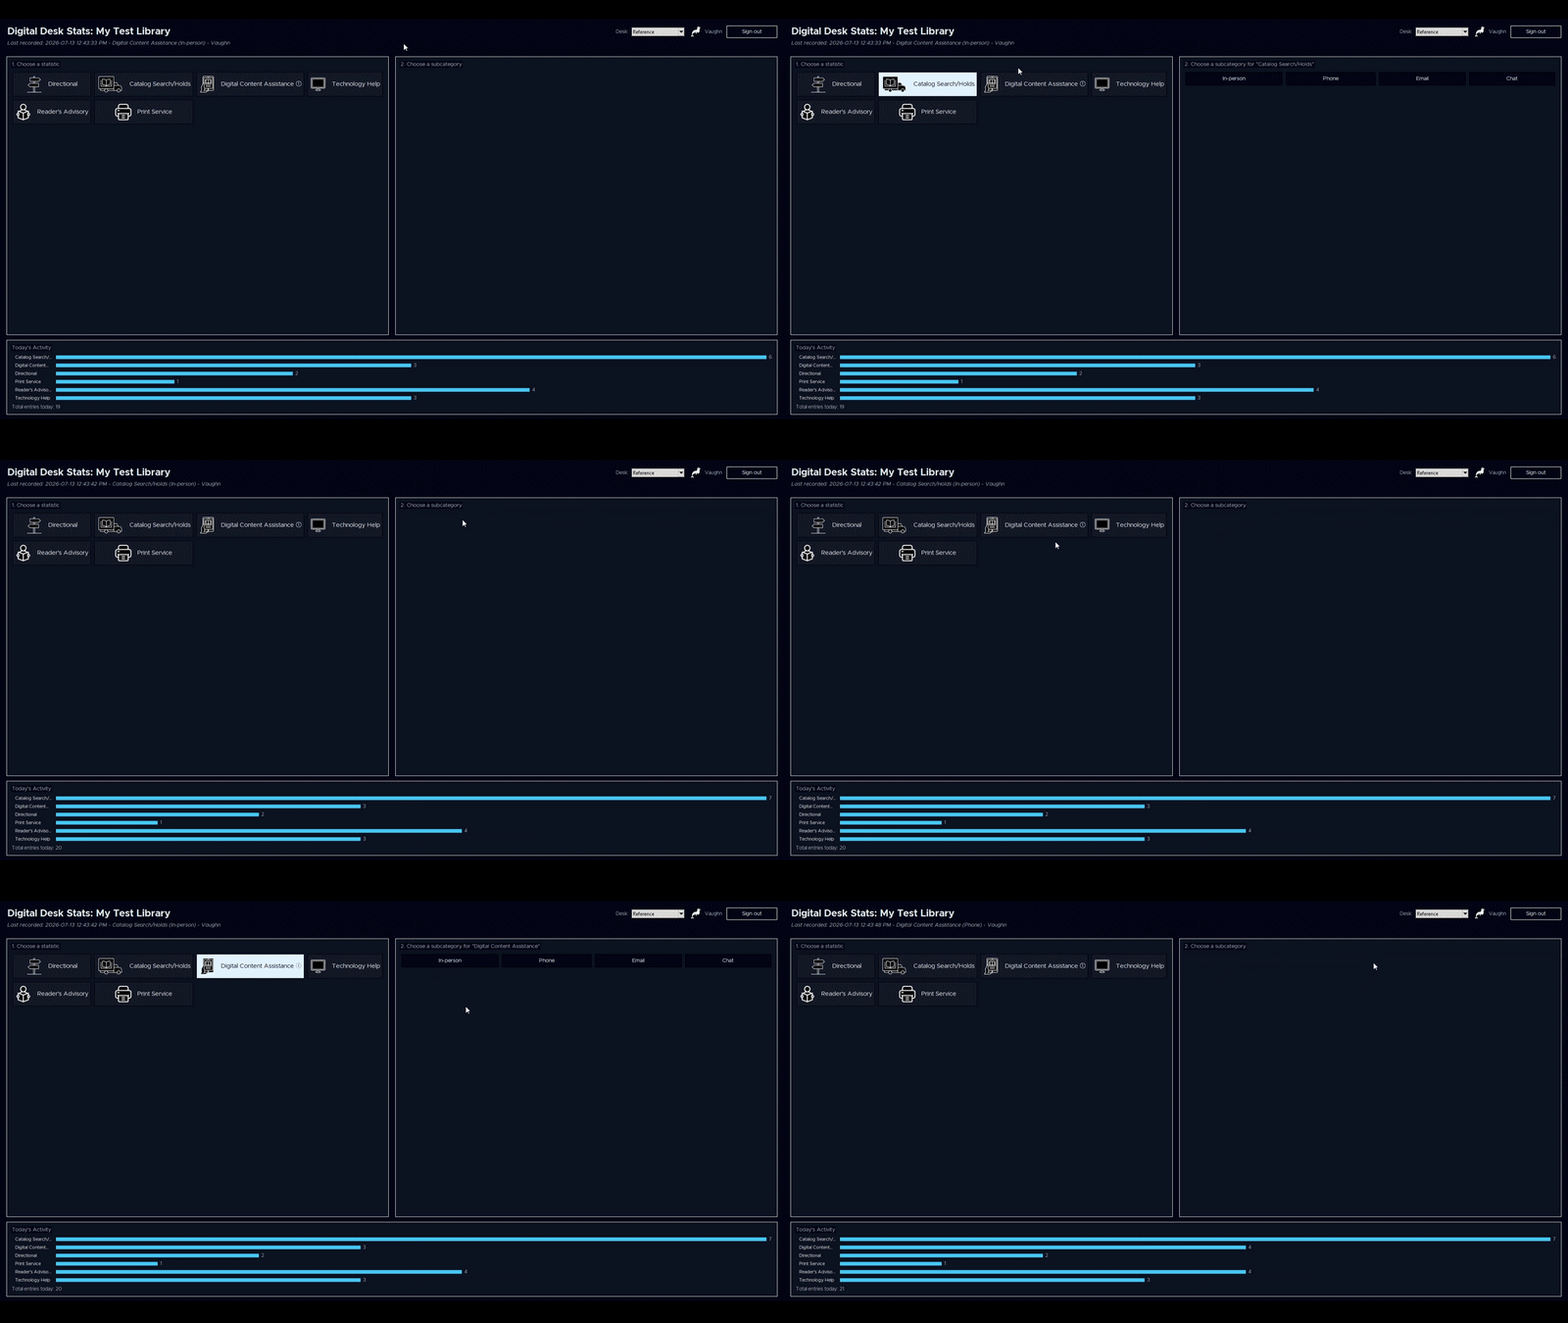
- Select a statistic you wish to record on the left hand side.
- Select a subcategory of that statistic on the right hand side.
- This will record the date, time, statistic, and subcategory in a .CSV file in the folder you specified in Options. If you forget where that is, you can see in the options menu or in “log_file” in
config.json.
- If a user is signed in, their name will be recorded along with the statistic.
- A little graph will appear on the bottom of the screen visualizing your recorded statistics.
- The status text below the title will update to include the last recorded statistic.
- At the bottom left of the screen, a message will appear counting the total entries for the day.
Retrieving your stats
You can retrieve stats either from the stat log directory you specified in the options menu, or, you can select File → Export Summary for a cleaner breakdown (recommended).
Miscellaneous
You can check for updates at Help → Check for Updates. Plans for the future include:
- Bug fixes (duh :P)
- Built-in bug reporter/feature requester
- Mac support
You can read the maual at Help → Manual.
Issues, bugs, questions, suggestions, etc.
You can reach me at digital.desk.stats@gmail.com
Downloads
Version 1.0.0.0 (most recent version)
- Windows